Showing posts with label Desserts. Show all posts

Monday, June 6, 2011

Semifreddo


Want to make your own frozen dessert but don't have an ice cream maker? Semifreddo is not only easy to make, it requires very few ingredients. It's consistency falls in between a mousse and ice cream, with the taste of frozen custard. It can be made in pies, used for ice cream cakes, or just the old fashioned way (in a pan).

I have posted two different recipes. The chocolate recipe is meringue based, so it's a bit fluffier. The lemon recipe is custard based, making it a tad bit richer and denser.

You can take either recipe and add any flavoring of your choice. Nutella, berries, any citrus fruit, coffee, and coconut are just a few a options. Both recipes call for 1/2 cup of the flavor base, so take it to town with your creativity. Another option is to fold in nuts or berries for additional texture.

The recipe calls for a 9 x 13-inch pan, but semifreddo can be made in any mold. Whether you are having a dinner party and want individual plates, or just want to scoop it out, I have added a quick plating tutorial at the bottom of the page.

Milk Chocolate Semifreddo:


Ingredients:
8 oz (1/2 cup) milk chocolate*
1 cup heavy cream
2 egg whites
1 cup sugar

* I bought two bars of Lindt (both weighing 4.4 oz each) and took off a few squares for garnish

Preparation:

Whip cream to a soft peak and refrigerate.


Chop or break up chocolate and melt over a double boiler.


Combine egg whites and sugar and whisk over a double boiler til hot to the touch (about 3-4 minutes). If you have a thermometer, the technical temp is 170°.

Beat the egg white-sugar mixture with a handheld electric mixer until stiff peaks form and the egg whites are shiny and glossy ( about 3 to 5 minutes).


Gently fold the cream into the chocolate, then fold the meringue into the chocolate/cream mixture. Fold in nuts/berries if desired.


Pour into prepared pan (chocolate garnish is optional) and freeze at least 4 hours.


Lemon Semifreddo

Ingredients:

1/2 cup pistachios (chopped)
1 3/4 cup heavy cream
1 1/4 cups sugar
7 egg yolks
1/2 lemon juice (Meyer lemons are preferred, but not necessary)
1 TBS grated lemon peel
1/4 tsp salt

Preparation:

Same prep (without the melted chocolate)

Whip cream and refrigerate.

Heat sugar, lemon juice/peel, salt, and yolks over a double boiler to 170°. Beat custard until thick and double in size (about 4-5 minutes).


Fold cream into custard and pour into pan. Freeze.

*See plating below for use with pistachio garnish.

Different plating methods:


Cutting slices


Line a 9 x 13-inch pan with plastic wrap, leaving extended overhang. Sprinkle pistachios on the bottom of the pan and pour in the custard. Freeze.


Once frozen, lift out the semifreddo (using your plastic overhang) and place on a cutting board. Wet your knife in warm water and dry off with a clean towel. Cut.


Ramekins or molds:


Pour custard into molds and freeze for at least 4 hours.

Run the ramekin under warm water (especially the bottom).


Run a paring knife or small offset spatula around the edge of the mold.


Invert onto a cold plate.


Garnish with pistachios.

Scooping:

Do I need to explain this?


Want a layered semifreddo? Cut the recipe in half and make two batches with different flavors. Pour first custard into the pan and refrigerate the other portion. Freeze for 45 minutes and pour second flavor on top. Freeze for at least 4 hours.

Monday, May 30, 2011

Mixed Berry Streusel Cobbler


I have made this pie about 5 or 6 times and it is always a crowd pleaser. This recipe should be made a day ahead. Pies, soups, salsas, and most sauces need time to get all of the flavors in full unity. Pies also need time to rest and firm up for easy cutting. So plan ahead!

Crust
2 1/4 cups all purpose flour
1 tablespoon sugar
1/2 teaspoon salt
7 tablespoons chilled unsalted butter, cut into 1/2-inch cubes
1/3 cup chilled solid vegetable shortening, cut into 1/2-inch cubes
6 tablespoons ice water

Topping
6 tablespoons (packed) golden brown sugar
1/4 cup whole almonds
6 tablespoons (3/4 stick) chilled unsalted butter, cut into 1/2-inch cubes
4 1/2 tablespoons old-fashioned oats
4 1/2 tablespoons all purpose flour

Filling
1 cup sugar
1/4 cup large pearl tapioca*
2 tablespoons fresh lemon juice
5 cups assorted fresh berries
1 TBS cinnamon

*Let's talk about tapioca for a second. I grew up with 6 brothers and sisters who LOVED tapioca. I hated it, and always got upset b/c everyone got a treat but me. But mixing it in pies creates an insanely rich and creamy consistancy. So needless to say, tapioca and I are mending our relationship.

For crust:
If you want to be a hardcore baker, use your hands! Something really bothers me about food processor crust making. It just seems lazy and I prefer to put my blood, sweat, and tears into my cooking. On the other hand, I'm trying to be a better person, so if that is your method, go for it.

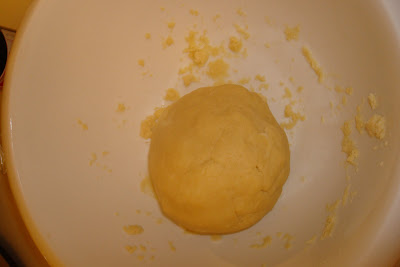
In a large bowl, add flour, sugar, and salt. Slowly add in the butter and shortening and break up into the flour. Don't over do it, you want the flaky crust, and overworking your dough can prevent that. Once the mix resembles a course cornmeal appearance, add 5 tablespoons ice water, adding more water by teaspoonfuls if mixture is dry. Gather dough into ball and flatten into disk. Wrap in plastic and chill at least 1 hour. 2 hours is preferred.


For filling:
Mix sugar, tapioca, lemon juice, and cinnamon in large bowl. Add berries and toss gently to combine. Let stand until tapioca softens slightly, stirring occasionally, about 45 minutes.


For topping:
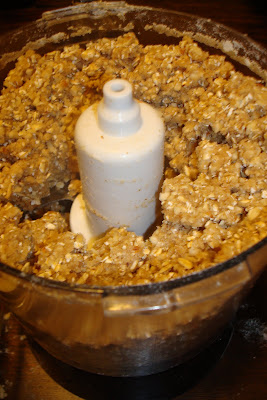
Combine all ingredients in a food processor. Process until moist clumps form. Set aside.


Preheat oven to 400°F.

After resting in the refrigerator, let dough sit at room temp for about 10 minutes.
Roll out dough on lightly floured surface to 15-inch round. Transfer to 9-inch-diameter glass pie dish. You can make some fancy "crimp" work with the dough, but I prefer to use all of it and skip the overhang. Freeze crust 20 minutes.

Spoon filling into crust.


Crumble topping evenly over filling.


Wrap pie in foil and bake for 30 minutes. Remove foil and continue baking another 20-30 minutes, until crust and topping are golden brown and filling is bubbling, Transfer pie to rack and cool at least 3 hours (it you MUST make the same day).

Sorry I did not take a picture of the pie right out of the oven. The truth is my husband and I stayed up late and dove into it around 3am. These things happen.

Sunday, May 29, 2011

Raspberry Marshmallows


I feel like a total jerk, b/c I was so excited to experiment, that I forgot to take pictures of the entire process. Don't fret ladies, I have a few more marshmallow ideas (coffee flavored & root beer) so I will repost with pics in the next few weeks. Honestly, I would love to have an entire blog category devoted to gelatin and all of it's awesomeness.

I have made marshmallows a few times before and have made some mistakes, so please take my suggestions seriously. This is kind of a sticky, messy project and throwing that hard work down the drain is pretty depressing.

First and foremost you MUST have a candy thermometer! Don't try to get all crafty and think you know what the soft ball stage looks like. Guilty.

Second DON'T forget the flavoring. I once made a batch and at the tail end realized I was out of vanilla. Oh the heartbreak!

I like big fat ridiculous marshmallows so this recipe is calling for an 8x8" pan. Obviously any pan will do, but your thickness will vary. Using an 8x8, produces marshmallows about an inch thick.

This is Alton Brown's recipe...with a few tweaks of course.


Ingredients
3 packages unflavored gelatin
3/4 cup ice cold water, divided
1 1/2 cups sugar
1/4 cup raspberry puree*
1 cup light corn syrup
1/4 tsp kosher salt
1 TBS vanilla extract
1/2 cup confectioners' sugar
Red food coloring (optional)
Nonstick spray or a neutral oil

*You can make any berry puree. Just toss a handful of berries in your food processor and strain out the seeds.

Directions

Lightly oil or spray your pan and coat generously with powdered sugar.

Place the gelatin into the bowl of a stand mixer (with whisk attachment) along with 1/4 cup of water and the puree. For a super berry flavor, sub the 1/4 cup of ice water with puree (totalling 1/2 cup). I have used a hand mixer with no problems, other than total boredom from standing over a bowl for 10 minutes.

In a small saucepan combine the remaining 1/2 cup water, granulated sugar, corn syrup and salt. Place over medium high heat, cover and allow to cook for 3 to 4 minutes. Uncover, clip a candy thermometer onto the side of the pan and continue to cook until the mixture reaches 240 degrees F, approximately 7 to 8 minutes. Once the mixture reaches this temperature, immediately remove from the heat.

Turn the mixer on low speed and, while running, slowly pour the sugar syrup down the side of the bowl into the gelatin mixture. Once you have added all of the syrup, increase the speed to high. Continue to whip until the mixture becomes very thick and is lukewarm, approximately 12 to 15 minutes. Add the vanilla a food coloring during the last minute of whipping.

Take a spatula and dip it in oil (something neutral like safflower or canola) and scrape as much of the marshmallows out of the bowl and into your prepared pan. You may need to re-dip if it gets too sticky. Just fill a ramekin with oil and keep handy. Spread out the mixture as evenly as possible (again don't be afraid to oil the spatula) and cover. Marshmallows need to sit for a few hours or overnight.

Cutting:
I wanted to experiment with shapes this time, but the old fashioned square is just as good.

Cutting squares:
Dust a cutting board with powdered sugar and flip the marshmallows out of the pan. Keep enough sugar out to continue dusting when needed. Do I need to explain cutting cubes?

Cutting Shapes:
Unfortunately not all of my cutters worked (actually most of them). I was really hoping for a bunny or pig, but sometimes dreams just don't come true.

Par freeze the pan for about 30 minutes and transfer to cutting board dusted with powdered sugar. Dip your cookie cutter in sugar and go to town. The hearts came out very cute, but I wanted to post the failed pig too.


So after cutting I had a pretty big mess of scraps and didn't want to throw them out. I put my brain to work and thought "oh snip rice crispy treats!" Toss the scraps in a pan over medium heat and add about a tablespoon of butter. Add a couple of cups of rice crispies ( or enough to get a good consistancy)and you have just made two magical treats!


Thursday, May 26, 2011

Blueberry Buttermilk Bundt Cake...LIKE WOAH!

As most of you know... I am not the one that bakes, cooks, or even grocery shops...I leave that to Gigi, and my Lady Husband. But I decided to act like a lady and bake a bundt cake. and BOY OH BOY.. this is easy..and didn't taste so bad either!

Ingredients

3Cups of All Purpose Flour
1 Tablespoon Baking Powder
1 Teaspoon Salt
1 2/3 Cups Sugar
3/4 cup of Unsalted Butter at Room Temp.
3 Large Eggs
1 Tablespoon of Grated Orange Peel
2 Teaspoons Vanilla Extract
3/4 Cup of Buttermilk
2 Cups of Frozen Blue Berries.


Preheat oven to 350F. Butter and flour a 10 inch diameter Bundt pan. Whisk flour, baking powder, and salt in a medium bowl. Using an electric mixer, beat sugar, and butter in a large bowl until light and fluffy. Beat in eggs, 1 at a time. Beat in the orange peel and vanilla. Beat in dry ingredients in 3 additions alternating with the buttermilk in 2 additions. Fold in blueberries and pour the batter into the pan. Bake for about an hour or until the tester inserted near the center of the cake comes out clean.

Cool cake in pan for 10 minutes, and the Turn the cake out on to a rack to cool completely.

**Frozen blueberries will not sink to the bottom of the cake pan**
**The batter came out REALLY thick and didn't quite pour into the pan as much as me having to scoop it out of the bowl and schlep it into the pan.**

Don't be scared...it will all be okay.

Sunday, May 1, 2011

Caramelized Macaroons


Ingredients:
1 egg white
1/4 cup flour
1 14oz bag of shredded coconut
1/2 tsp salt
2 tsp vanilla
1/4 tsp almond extract
1 14oz can of condensed milk

Caramelizing the milk:
Submerge the can of condensed milk in boiling water for 45 minutes. You can go longer if you want it richer and darker. Let the can cool on the counter for a couple of minutes before opening.


Whip egg white until white and fluffy (about 1 minute) and add remaining ingredients. Freeze for about 15-20 minutes.

Preheat the oven to 320 degrees. Spoon out mix onto a parchment lined cookie sheet. Bake until golden brown, about 15-20 minutes. Keep the bowl in the freezer in between batches. Once removed from the oven, immediately transfer to a cooling rack. Makes about 2 dozen macaroons.